Using Tmuxinator to automate your environment
How to maintain your sanity when dealing with complex environments
Laptop Macbook by StockSnap is licensed under CC0 Public Domain
Recently we inherited an existing codebase that uses a service oriented architecture. This particular application required launching nine server instances before the website would work. Now I’m not afraid of a little setup for doing my work, but running nine services gets old and I’m lazy…eh…I mean efficient. Tmux to the rescue!
Tmux
If you haven’t used tmux before, you should definitely give it a try. It’s a terminal multiplexer that is like Screen, but has some extra capabilities. The Internet has many tutorials on tmux if you’re interested.
One ability of tmux is that it can receive command line requests and perform them on active sessions. For example, if you have a tmux session open you can issue something like:
> tmux send-keys 'cd ~' Enter
This command will execute inside your tmux session and cd to your home directory. The text Enter at the end informs tmux to send a carriage return and execute the text.
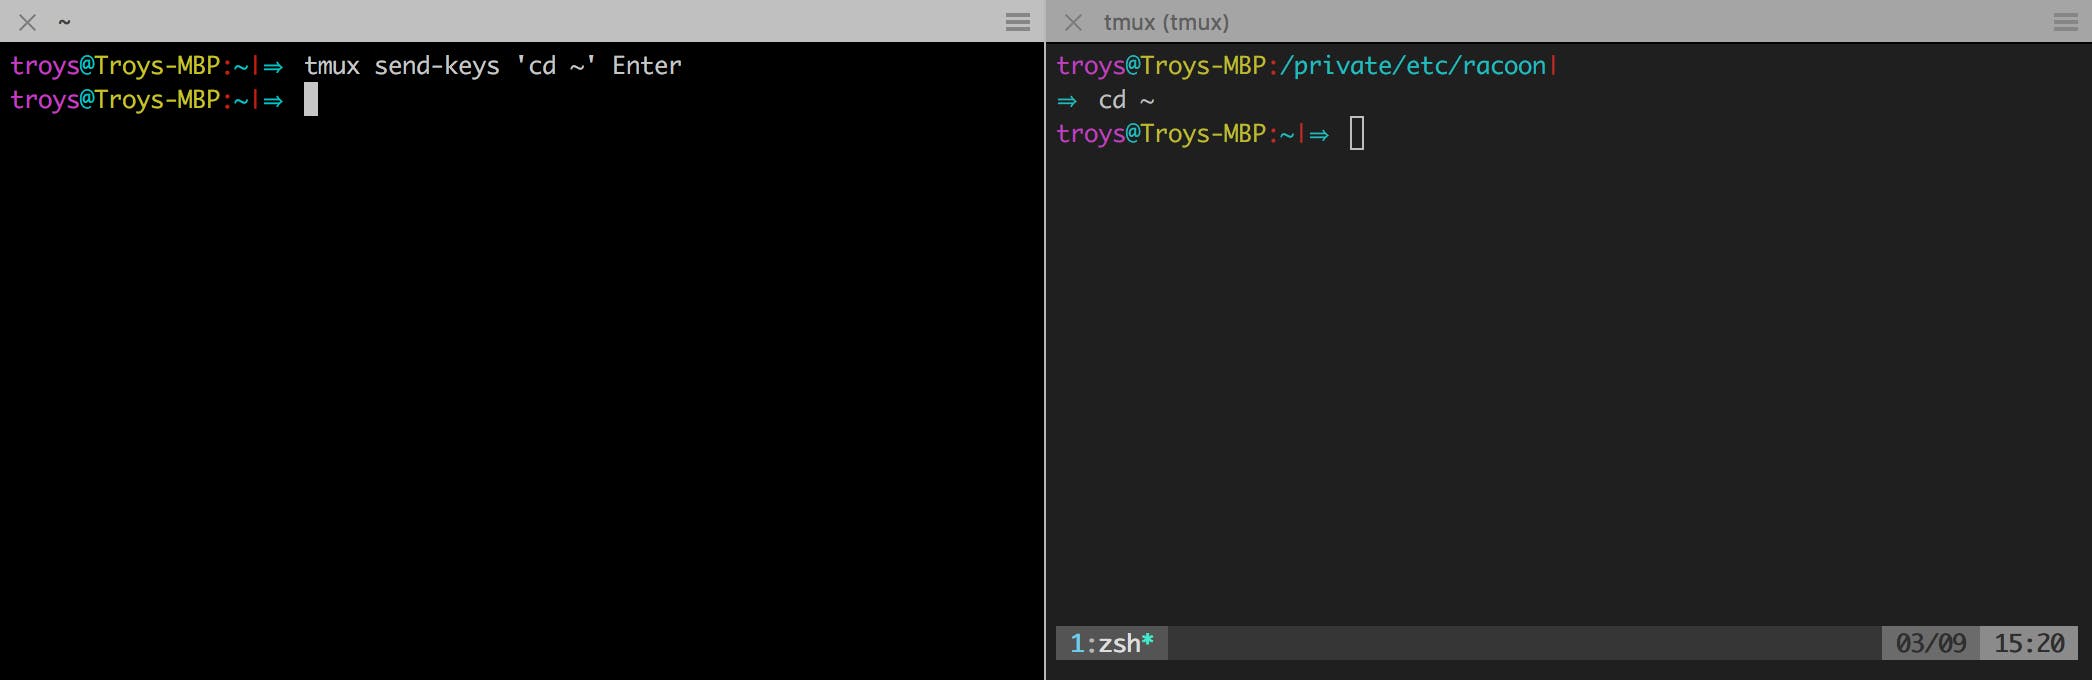
You can also use C-m instead of Enter which appears to be a more standardized way of executing a command.
Tmuxinator
Building a script to talk to tmux might be fun, but it was going to take a complex configuration. Plus, I was still trying to be, uh, efficient. Say hello to Tmuxinator!
Tmuxinator is a command line tool that helps to automate your tmux setup. The tool can create stored sessions by name and has a simple system for defining how things get positioned. Let’s try it out!
Setting up Tmuxinator
Assuming you have tmux already configured, setting up tmuxinator is pretty straightforward. Tmuxinator comes packaged as a Ruby Gem so installation should be as easy as:
> gem install tmuxinator
It’s best to refer to the official instructions in the event things don’t go right. Once complete, you should be able to run the tmuxinator command from the shell. Since that is way too much typing, I created an alias in my .zshrc file with the following:
alias mux="tmuxinator"
This allows me to run mux instead of the full command. The same alias should work if you’re using a different shell like bash. Also, since I’m running Zsh with Oh My Zsh I can just enable the tmuxinator plugin by adding it to my list of loaded plugins. This provides some nice tab completion.
Using Tmuxinator
Let’s create our first script!
Step 1. Issue the following command:
> mux new monitor
If everything works, it should load your text editor ready to edit a new script named monitor. (You can name it most anything.)
The sample script is a very Ruby centric script, but don’t let that hold you back from using it for other things. Running any combination of shell commands should work fine.
The script gets saved as a .yml file in a ~/.tmuxinator/ directory. So if you’d rather open the file in a different editor or commit changes into a Git repository, you can.
Step 2. Edit your script
You can now start to make changes to your new script. If you want, you can also save and exit from the script and come back at a later time by running:
> mux edit monitor
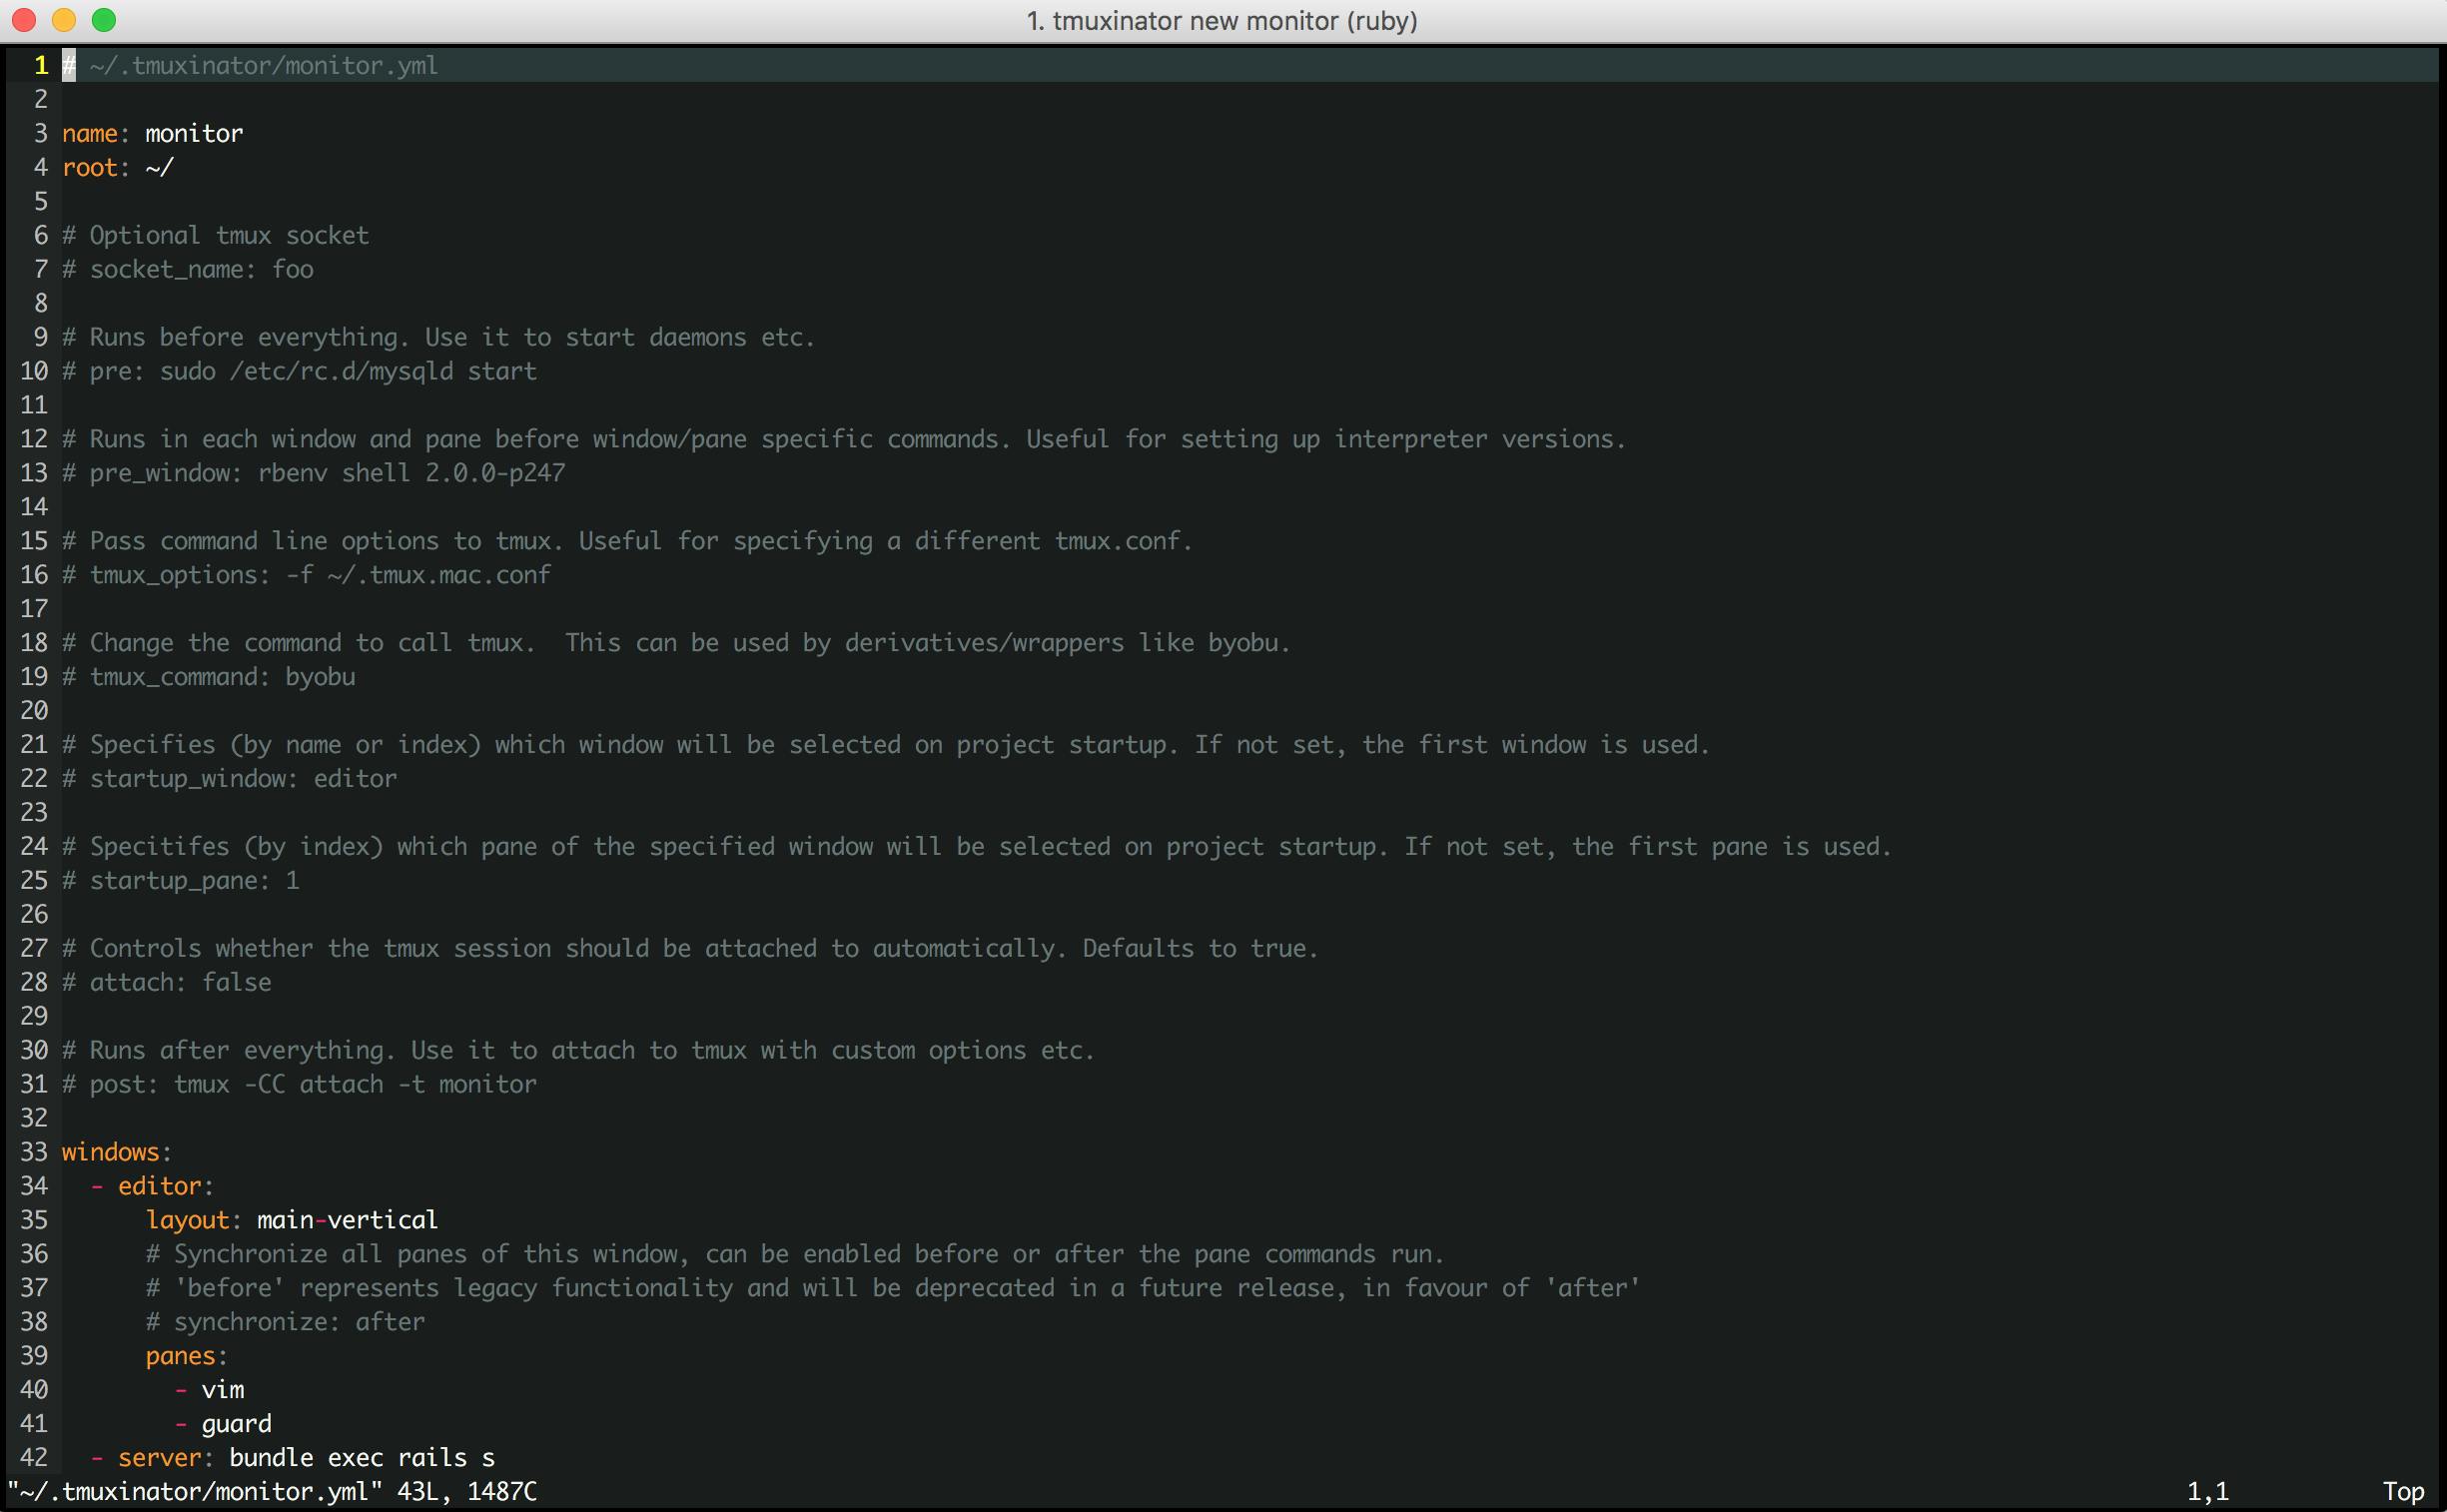
Edit your text file to have the following script:
# ~/.tmuxinator/monitor.yml

name: monitor
root: ~/

windows:
  - status_things:
      layout: main-horizontal
      panes:
        - top
        - uptime
        - whoami
  - io_things:
      layout: tiled
      panes:
        - lsof
        - iostat -w 10
        - netstat
        - vim
  - more_things:
      layout: main-vertical
      panes:
        - is_my_machine_alive:
          - ping localhost
        - run_several_commands:
          - cd /
          - cd var
          - cd log
          - ls
This example script is quite silly, but you should be able to understand the general idea. The structure is in a simple indented yaml format, so updating it is straightforward.
The script defines a name and an initial root directory. (Adjusting the root can be useful if most of your commands start from the base of a project.) It then goes on to define three windows named status_things, io_things, and more_things. You can rename these to whatever you’d like.
Within each window I set the layout to either main-horizontal, tiled, or main-vertical. (even-vertical and even-horizontal are also options as defined in the tmux main page.) Next, we define the panes that get created inside each window using the layout. Under each pane you then give the command to execute (e.g. like top). If you need to execute many commands you can define another grouping here. (e.g. like run_several_commands)
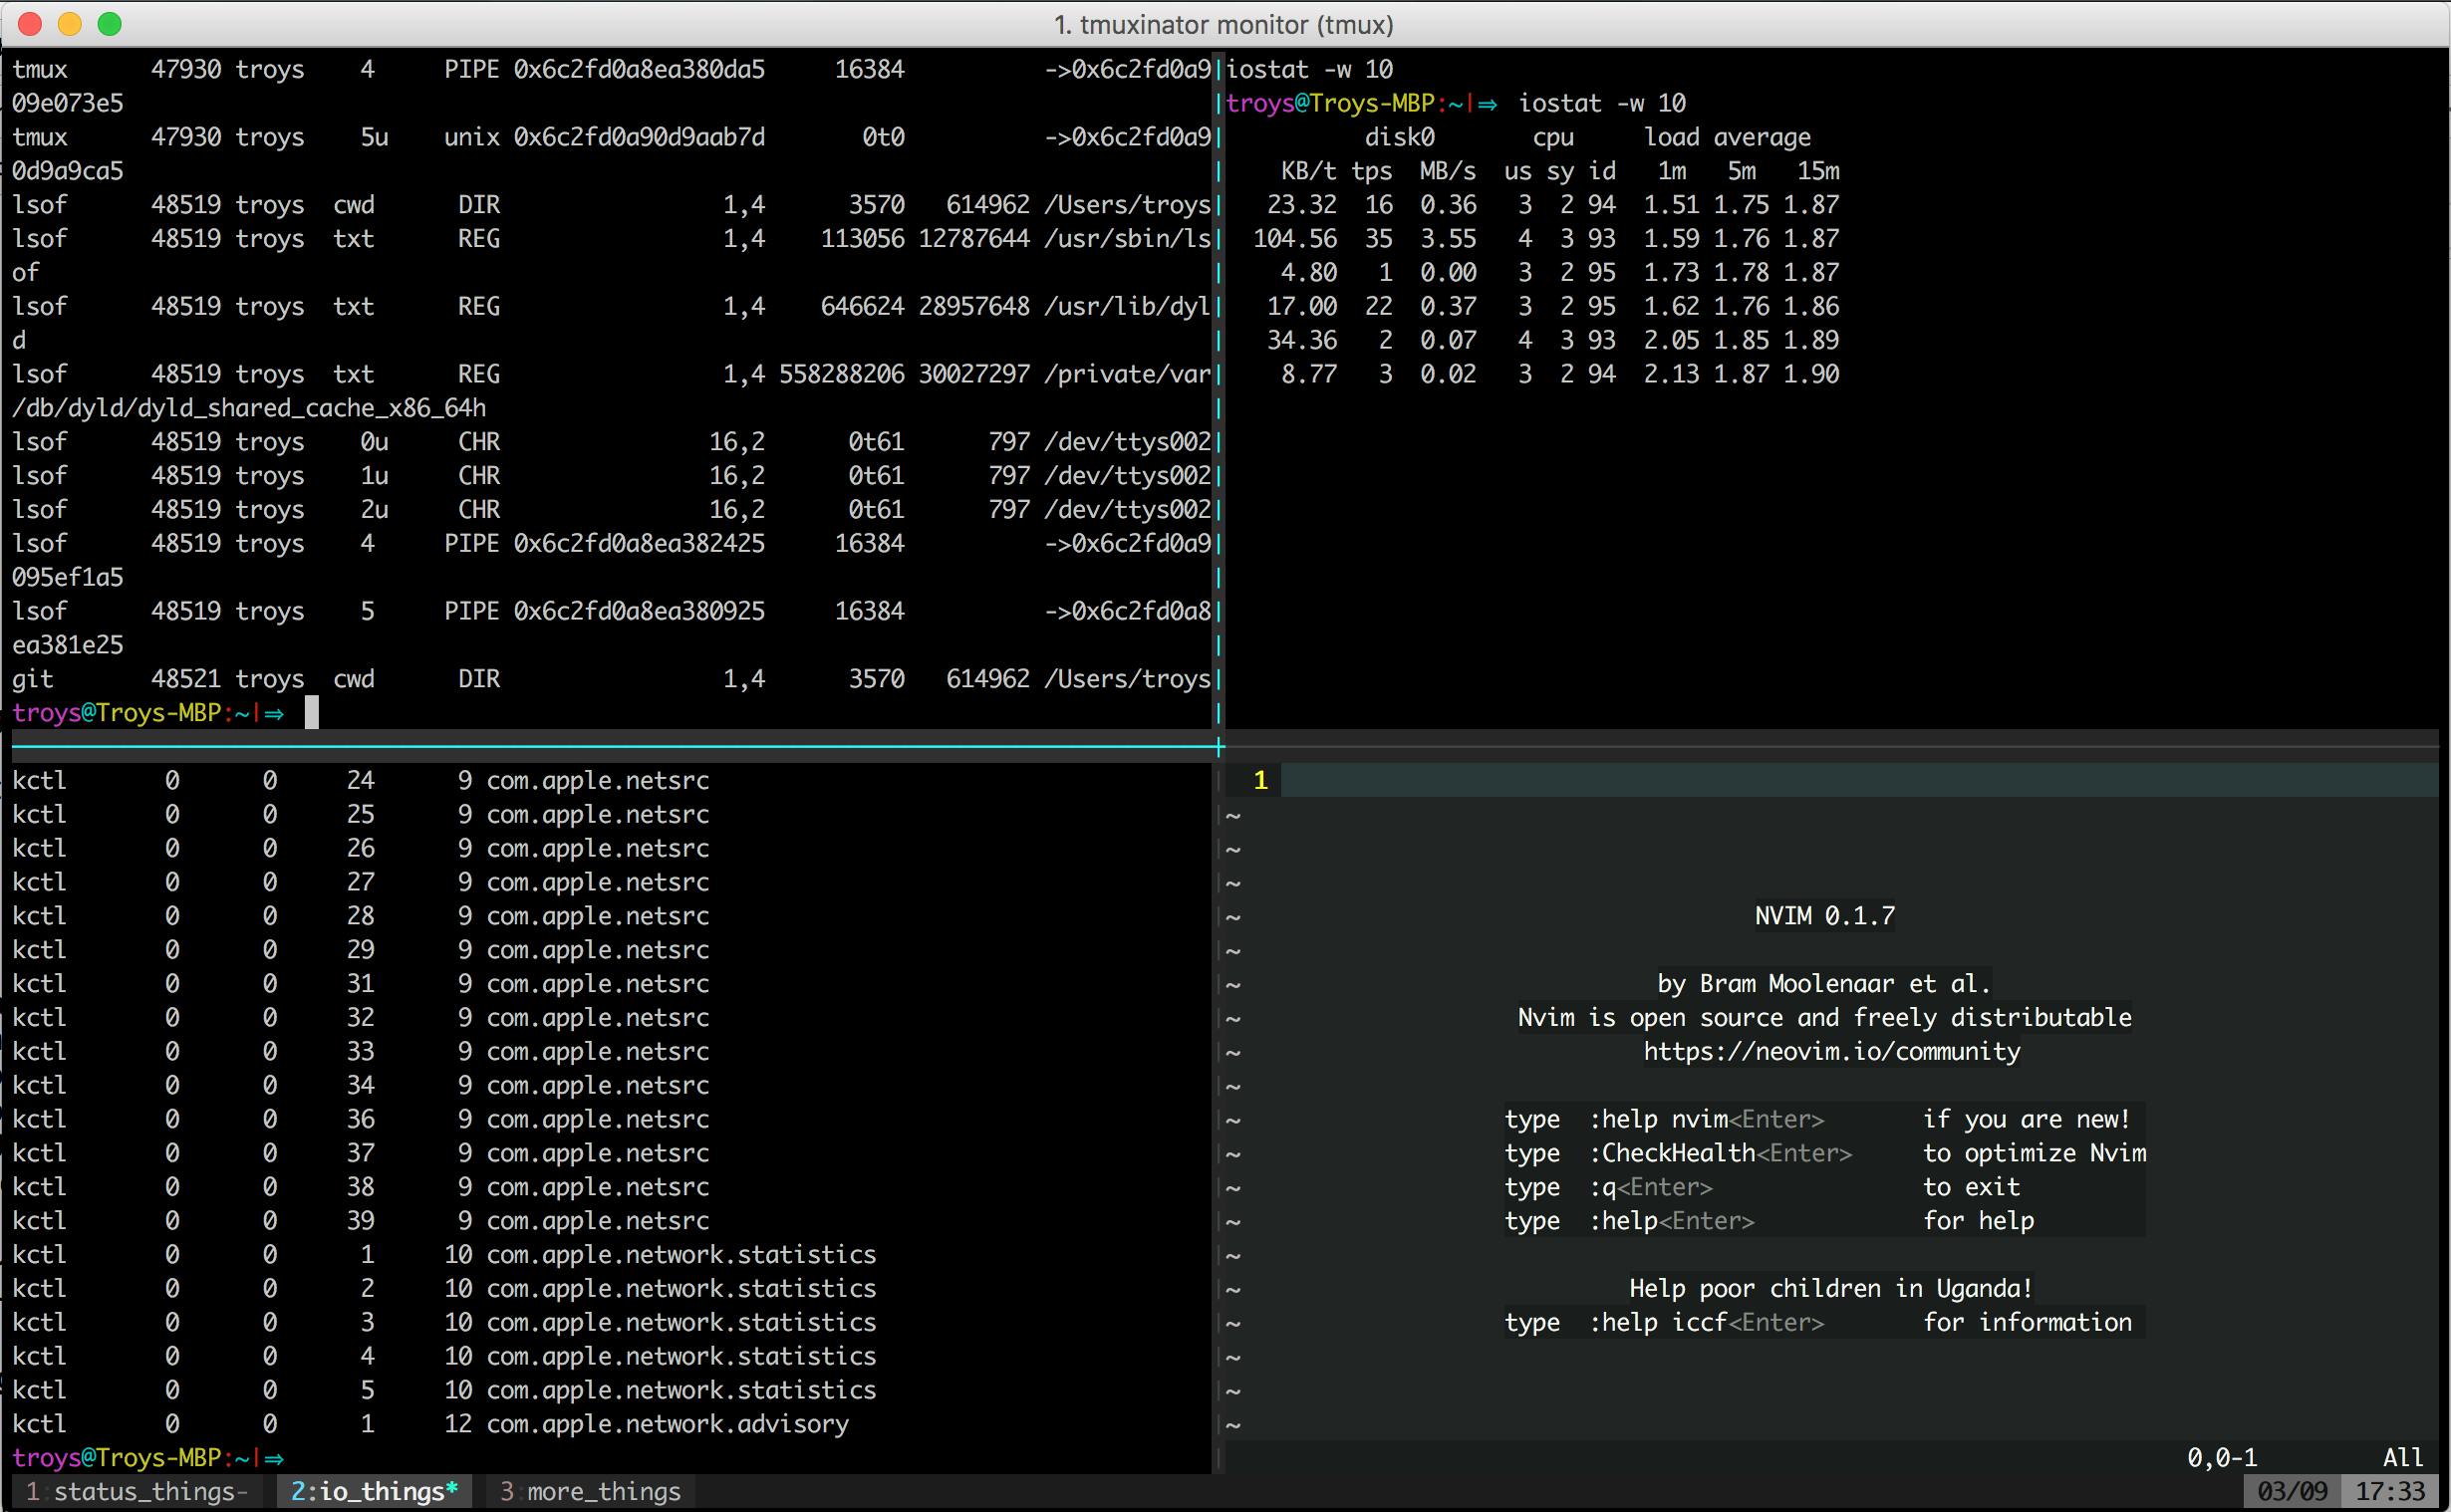
Step 3. Run your script
Once you’ve saved your script, you can execute everything at once by issuing the command:
> mux monitor
You should see a flurry of activity as tmux creates windows, panes, and executes your commands.
Step 4. Debug your script
Depending on the complexity of your setup, you may run into some unexpected bugs. Tmuxinator has a very helpful command to work through these challenges as well. You can run the following command:
> mux debug monitor
Tmuxinator prints out all the generated shell script commands so you can see what it is attempting to do. For example:
#!/usr/local/bin/zsh

# Clear rbenv variables before starting tmux
unset RBENV_VERSION
unset RBENV_DIR

tmux start-server;

  cd /Users/troys

  # Run pre command.

  # Create the session and the first window. Manually switch to root
  # directory if required to support tmux < 1.9
  TMUX= tmux new-session -d -s monitor -n status_things
  tmux send-keys -t monitor:1 cd\ /Users/troys C-m

  # Create other windows.
  tmux new-window -c /Users/troys -t monitor:2 -n io_things
  tmux new-window -c /Users/troys -t monitor:3 -n more_things

  # Window "status_things"
  tmux send-keys -t monitor:1.1 top C-m

  tmux splitw -c /Users/troys -t monitor:1
  tmux select-layout -t monitor:1 tiled
  tmux send-keys -t monitor:1.2 uptime C-m
  ...
If your debugging gets desperate you can even redirect the output to a file and run it by hand.
> mux debug monitor > test.sh
Step 5. Next Steps
Now it’s your turn. Run mux new <your script> and see how many beautiful windows and panes you can automate the creation of. Tmuxinator has many other commands that may prove useful too. Once you have all those running maybe I’ll do a blog post on how to alias x to be the exit command. :)
About Troy Spruit
Troy has been building software for nearly 25 years in about every technology you can think of. His experience comes from working in manufacturing companies, creative companies, and his own company.
Comments
not bad. i am still getting to grips with tmux itself on bash on ubuntu on windows and disappointed many plugins still unavailable on windows bash
I’ve never heard of Tmuxinator, It’s a life saver
Thanks